When you’ve sketched out an innovative lightweight drone frame, a durable automotive bracket, or a sleek enclosure for a new consumer electronics device. The concept is exciting, but the path from idea to physical part feels daunting—where do you begin with prototyping or small-batch production?
This is where aluminum CNC machining shines as the most popular and reliable solution. Aluminum delivers the perfect balance of lightweight properties, an exceptional strength-to-weight ratio, high corrosion resistance, and outstanding machinability. It enables fast turnaround times, intricate geometries, and full customization—making it the material of choice for drones, automotive components, consumer gadgets, and beyond.
In this comprehensive guide, we’ll take you step-by-step through the entire aluminum CNC machining process: from selecting the right alloy and optimizing your design for manufacturability to programming the CNC machine, post-processing finishes like anodizing or polishing, and quality inspection. It’s the complete story of transforming a digital drawing into a precision-engineered part that performs in the real world.
Whether you’re prototyping a single piece or scaling to production, aluminum CNC machining turns concepts into reality with precision and speed. Let’s dive in.
What is Aluminum CNC Machining?
Aluminum CNC machining is a subtractive manufacturing process that uses computer numerical control (CNC) machines to shape solid aluminum stock into precise, custom parts. Starting from a block or billet of aluminum (typically alloys like 6061 or 7075), the machine removes material layer by layer through high-speed cutting tools—such as end mills, drills, and taps—following a programmed digital design.
This method excels at producing complex geometries, tight tolerances (often ±0.01–0.05 mm), and smooth surface finishes with excellent repeatability. Aluminum’s key advantages—lightweight (about 1/3 the density of steel), strong, corrosion-resistant, highly machinable, and excellent for heat/electricity conduction—make it one of the most popular materials for CNC machining.
The process is widely used across industries for prototyping and production:
- Drone and UAV frames
- Consumer electronics enclosures and heat sinks
- Automotive brackets and custom components
- Robotics structures
- Aerospace fittings
It combines speed (aluminum machines are 3–5× faster than steel), cost-effectiveness for small-to-medium runs, and the ability to create intricate features without molds—making it ideal when you need functional, lightweight metal parts quickly.
In short, aluminum CNC machining turns your 3D CAD model into high-quality, ready-to-use components with unmatched precision and efficiency.
Why Choose Aluminum for CNC Machining?
You’ve got your design ready, and now the material choice will make or break performance. Your part needs to be lightweight yet strong, able to handle stress without adding unnecessary weight—think drone frames that maximize flight time or automotive brackets that improve fuel efficiency. Aluminum emerges as the perfect protagonist in this manufacturing tale.
Aluminum stands out for CNC machining due to its outstanding properties. It boasts an excellent strength-to-weight ratio, allowing parts to be robust while remaining light. Its superior machinability means tools cut cleanly and quickly, producing precise features with minimal wear. Aluminum offers natural corrosion resistance (enhanced further by anodizing), excellent thermal and electrical conductivity for heat dissipation in electronics, and it’s fully recyclable—aligning with sustainable manufacturing trends.
Data underscores these benefits: aluminum’s density is only about 2.7 g/cm³, roughly one-third that of steel (7.8 g/cm³), so identical parts in aluminum weigh far less. Machining speeds can be 3–5 times faster than steel, shortening lead times and lowering costs while achieving finer surface finishes.
To see how aluminum stacks up against common alternatives:
| Property | Aluminum | Steel | Titanium | Plastics |
|---|---|---|---|---|
| Density (g/cm³) | 2.7 | 7.8 | 4.5 | 0.9–1.5 |
| Strength-to-Weight | Excellent | Good | Outstanding | Poor |
| Machinability | Excellent (fast, clean cuts) | Fair (slower, more tool wear) | Poor (difficult, expensive) | Good (but soft) |
| Corrosion Resistance | Good (natural oxide layer) | Poor (requires coating) | Excellent | Varies (often good) |
| Thermal Conductivity | High | Moderate | Low | Low |
| Relative Machining sphing Cost | Low | Medium | Very High | Low |
Aluminum strikes the ideal balance for most prototyping and production needs—lighter and easier to machine than steel or titanium, yet far stronger and more durable than plastics.
Its clean, predictable chip formation during machining further reduces cycle times and improves safety. With these advantages, it’s no wonder aluminum dominates industries from aerospace to consumer electronics.
Most Commonly Used Aluminum Alloys and Their Characteristics
With your design finalized and aluminum chosen as the hero material, the next pivotal decision is selecting the right alloy. Think of it as equipping your protagonist with tailored gear—each alloy enhances specific attributes like strength, corrosion resistance, or machinability to suit the mission ahead, whether it’s a lightweight drone frame or a rugged automotive component.
Here are the most popular aluminum alloys for CNC machining, each with distinct compositions and performance profiles:
| Alloy | Main Alloying Elements | Key Properties | Machinability | Best Applications |
|---|---|---|---|---|
| 6061 | Mg, Si | Balanced strength, excellent corrosion resistance, good weldability and anodizing response | Excellent | General-purpose parts, frames, prototypes, consumer electronics enclosures |
| 7075 | Zn, Mg, Cu | Extremely high strength, superior fatigue resistance, good toughness | Fair | Aerospace structural components, high-stress military gear, bike frames |
| 2024 | Cu | High strength-to-weight, excellent fatigue resistance | Good | Aircraft wings/fuselage, high-performance automotive parts |
| 5052 | Mg | Highest strength in non-heat-treatable alloys, outstanding corrosion resistance (especially marine) | Good | Boat hulls, fuel tanks, sheet metal parts, pressure vessels |
| 6082 | Mg, Si, Mn | Higher strength than 6061, excellent corrosion resistance and weldability | Excellent | Structural components, bridges, trusses (common in Europe) |
| MIC-6 | Cast Al-Si | Exceptional stability, low internal stress, superior flatness | Excellent | Precision tooling plates, jigs, fixtures, inspection gauges |
| 6063 | Mg, Si | Good extrudability, smooth surface finish, moderate strength | Excellent | Architectural extrusions, heat sinks, window frames |
- 6061 is the undisputed “all-rounder”—versatile, cost-effective, and easy to machine, making it ideal for prototypes and everyday applications where balanced performance is key.
- 7075 delivers extreme strength rivaling some steels, perfect for demanding aerospace and defense parts that must withstand intense loads.
- 2024 shines in fatigue-prone environments like aircraft skins.
- 5052 excels in harsh corrosive settings, such as marine or chemical exposure.
- 6082 offers a European-favored alternative to 6061 with slightly superior strength.
- MIC-6 provides unmatched dimensional stability for precision tooling.
- 6063 is preferred for extruded profiles needing aesthetic finishes.
Recommendation: For most prototyping and mid-volume production, start with 6061—it’s widely available, machines quickly, and keeps costs down while delivering reliable results. When maximum strength is non-negotiable (e.g., high-performance or load-bearing parts), upgrade to 7075 despite its higher cost and slightly trickier machining.
Choosing the right alloy ensures your part not only meets specifications but also exceeds expectations in real-world use.
Aluminum CNC Machining Full Process: Step by Step
Now we step into the workshop—where your digital idea transforms into a tangible, precision-engineered aluminum part. The journey from raw stock to finished component is methodical, combining design expertise, programming precision, and skilled machining. Aluminum’s softness and high thermal conductivity make it forgiving yet demanding: success hinges on high speeds, sharp tools, and effective chip evacuation to avoid built-up edges or melting.
Here’s the complete process, broken down step by step:
- CAD Design Start with creating a detailed 3D model in software like SolidWorks, Fusion 360, or FreeCAD. Optimize for manufacturability: add fillets to sharp corners, avoid deep, thin walls, ensure uniform wall thickness, and specify tolerances realistically (e.g., ±0.05 mm typical for CNC). Export as STEP or IGES for CAM.
- CAM Programming Import the CAD file into CAM software (Mastercam, Fusion 360 CAM, etc.). Define toolpaths: roughing to remove bulk material quickly, then semi-finishing and finishing passes. Select tools (e.g., 2- or 3-flute carbide end mills for aluminum); set high spindle speeds (10,000–20,000 RPM), feed rates, and stepovers. Simulate to catch collisions or inefficiencies.
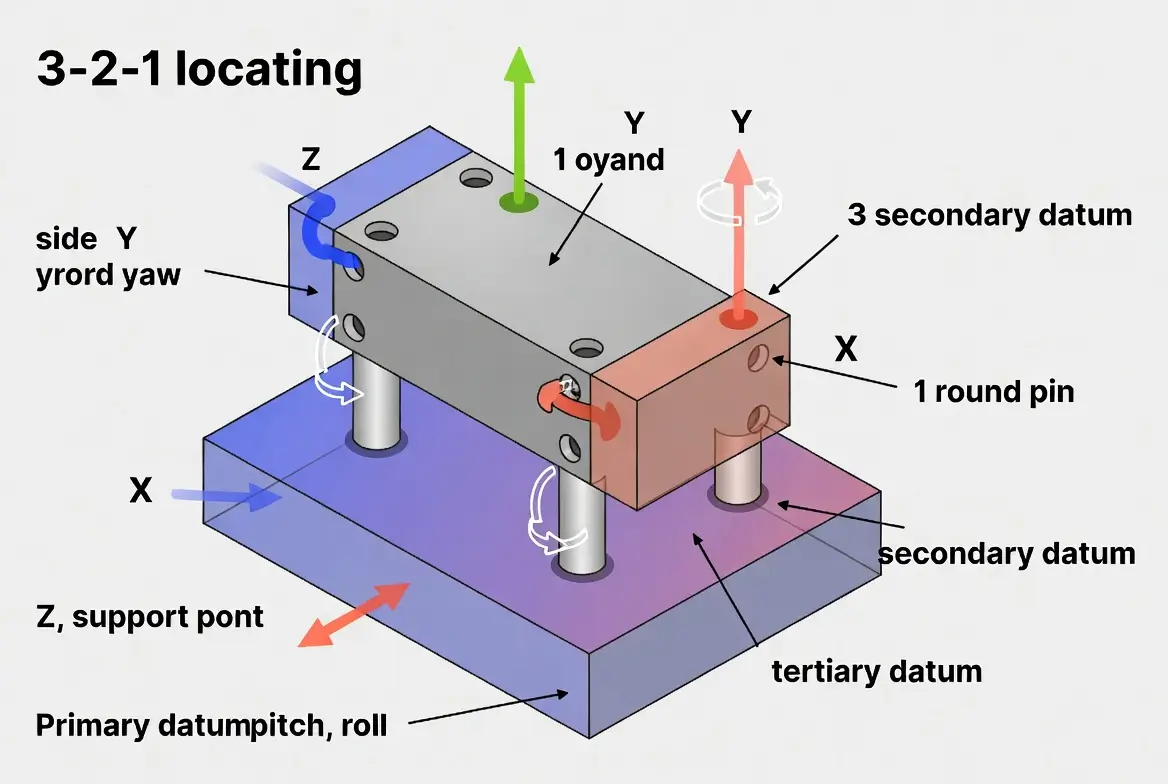
- Machine Preparation & Workholding Select the CNC mill (3-, 4-, or 5-axis). Secure the aluminum stock (plate or bar) using vises, clamps, or custom fixtures—ensure it’s rigid to prevent vibration. Align zero points precisely with probes or edge finders. Balance the setup for multi-sided machining if needed.
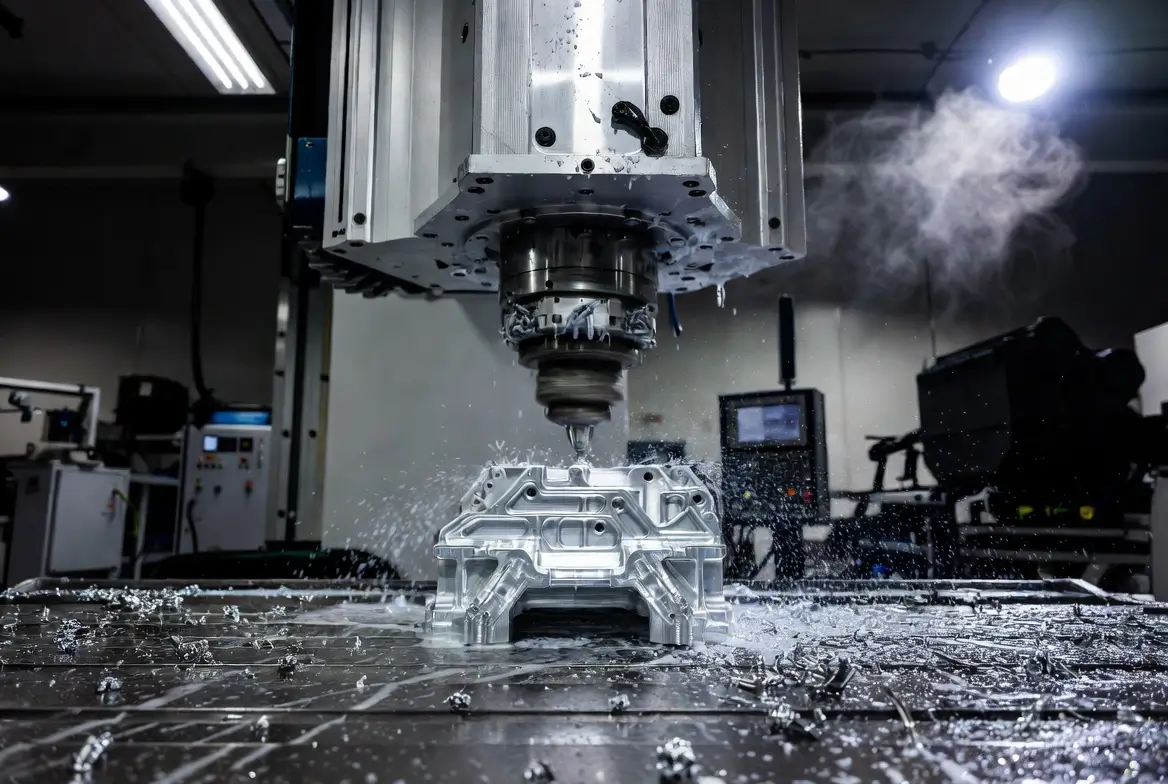
- Actual Cutting (Milling, Drilling, Pocketing, etc.) Run the program: high-speed milling with sharp 2-3 flute end mills excels for aluminum, producing clean chips and smooth finishes. Common operations include facing, contouring, pocketing, drilling/tapping, and engraving. Maintain climb milling direction for better surface quality and tool life.
- Coolant Usage Key Points: Use flood coolant or mist (MQL) to lubricate, cool the tool/workpiece, and flush chips—preventing aluminum from welding to the tool (built-up edge). Avoid dry machining unless using polished carbide tools designed for it; proper coolant extends tool life and maintains tolerances.
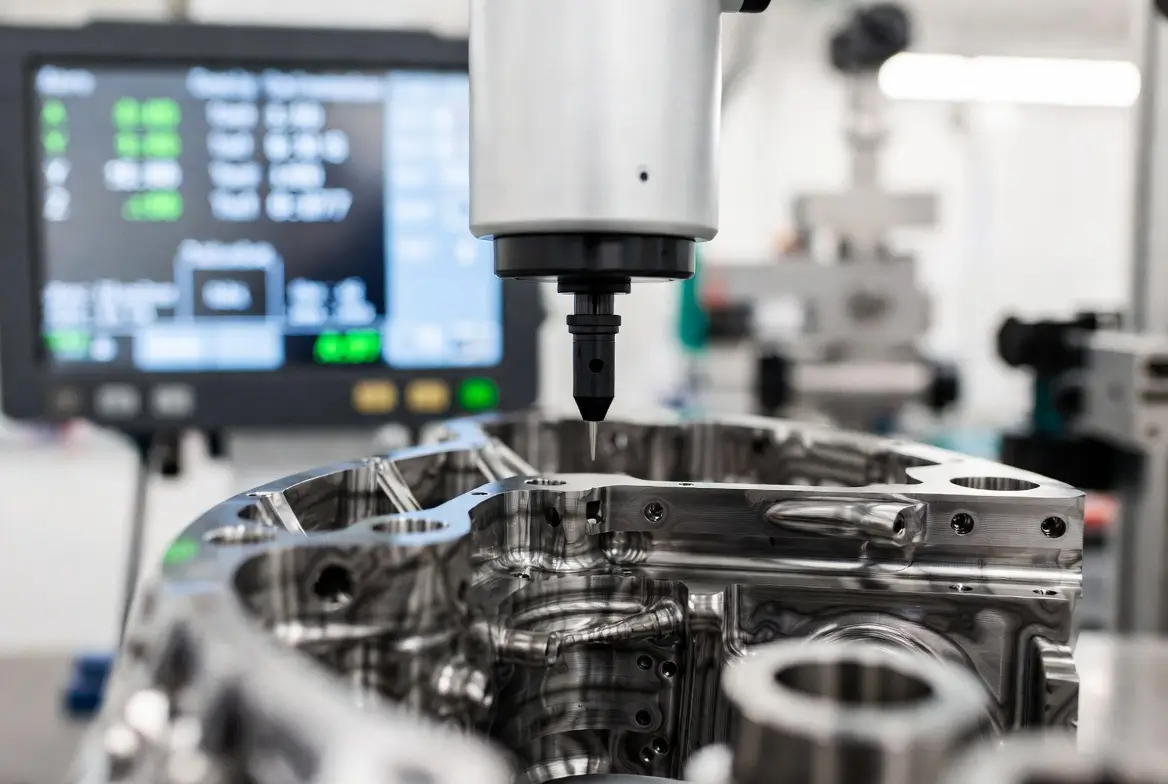
- Post-Processing & Quality Inspection Deburr edges manually or with tumbling/vibratory finishing. Apply surface treatments if required (anodizing, bead blasting, polishing). Inspect with calipers, micrometers, or CMM for dimensions, flatness, and surface finish. Verify critical features against the drawing.
Master these steps, and your aluminum part emerges accurate, lightweight, and ready for assembly—be it a drone frame or electronics enclosure. The key aluminum machining tricks—high RPM, few-flute tools, aggressive feeds, and excellent chip clearance—turn potential challenges into reliable, repeatable results.
Design & Machining Practical Tips (DFM)
To avoid plot twists that derail your project—such as parts warping, tools breaking, or excessive costs—apply these Design for Manufacturability (DFM) best practices early. Smart design choices make aluminum CNC machining smoother, faster, and more economical, turning potential headaches into seamless production.
Key practical tips:
- Minimum wall thickness: Aim for ≥1.0–1.5 mm for most features (thinner risks vibration, deflection, or breakage during machining). For small delicate parts, ≥0.8 mm is possible but increases cost and risk.
- Add fillets to internal corners: Sharp internal corners create stress concentrations and are hard to machine (tool must slow down or risk chatter). Use generous radii (at least 0.5–1× tool diameter, ideally 1–2 mm) to improve strength and machinability.
- Tool selection: Choose high-helix-angle carbide end mills (45°+ helix) with polished or ZrN/DLC coatings—these evacuate chips efficiently, reduce heat buildup, and prevent aluminum adhesion (built-up edge).
- Avoid deep, narrow slots/cavities: Depth-to-width ratio should stay below 4:1 (ideally ≤3:1) to prevent tool deflection and poor surface finish. Use stepped roughing or multiple tool sizes if deeper features are unavoidable.
- Set realistic tolerances: Default to ±0.1–0.2 mm for non-critical dimensions; reserve ±0.05 mm or tighter only for mating surfaces. Over-specifying tolerances dramatically raises machining time and cost.
Common beginner mistakes & how to dodge them:
- Designing razor-sharp corners → leads to weak points and tool dwell marks; always fillet.
- Ultra-thin walls without support → causes warping or chatter; add ribs or temporary tabs.
- Ignoring chip evacuation → results in recutting chips and poor finish; optimize toolpaths for climb milling and adequate coolant.
- Unrealistic tolerances everywhere → blows budget; apply tight specs selectively.
Follow these guidelines, and your aluminum parts will machine reliably with excellent quality and minimal rework.
Good DFM turns your design from a fragile prototype to a robust, production-ready component.
Surface Treatment Options
Your aluminum part is freshly machined—raw, functional, but ready for its final “makeover” to truly shine in the real world. Surface finishing not only boosts aesthetics and protection but also enhances durability, wear resistance, and sometimes electrical insulation. The right choice depends on your application: outdoor exposure, appearance, or cost control.
Common options for aluminum CNC parts:
- As-Machined (Mill Finish): Straight from the CNC—clean tool marks visible.
- Anodizing Type II (Sulfuric): Thin, decorative oxide layer (5–25 μm), often dyed in vibrant colors.
- Hard Anodizing Type III: Thick, hard oxide (25–150 μm), excellent wear/corrosion resistance, usually matte black or natural gray.
- Bead Blasting / Sandblasting: Uniform matte texture, removes tool marks, and preps for coatings.
- Powder Coating: Durable polymer layer in any color, good impact, and UV resistance.
Quick comparison:
| Finish | Corrosion Resistance | Appearance | Cost | Typical Use |
|---|---|---|---|---|
| As-Machined | Fair | Metallic, tool marks | Lowest | Internal/prototype parts |
| Type II Anodizing | Good | Smooth, colored | Low | Consumer electronics, enclosures |
| Hard Anodizing (Type III) | Excellent | Matte, hard | Medium | Aerospace, military, high-wear |
| Bead Blasting | Fair (improves with coating) | Uniform matte | Low | Aesthetic prep, soft look |
| Powder Coating | Very Good | Smooth, any color | Medium-High | Outdoor, architectural parts |
The most popular combo for high-performance aluminum parts: hard anodizing (Type III) + dyeing — it delivers superior hardness (up to 60–70 Rockwell C equivalent), outstanding corrosion protection, and customizable colors while keeping costs reasonable.
Choose wisely: a simple anodized finish can elevate a basic prototype to a professional-grade product ready for market.
Pros, Cons, Real-World Applications & Cost Considerations
Aluminum CNC machining delivers exceptional value for many projects, but like any process, it has trade-offs. Here’s a quick overview:
Advantages:
- Outstanding strength-to-weight ratio — lightweight yet strong
- Excellent machinability — fast production, tight tolerances, smooth finishes
- Superior corrosion resistance (especially with anodizing)
- High thermal/electrical conductivity
- Fully recyclable and eco-friendly
- Wide alloy variety for tailored performance
Disadvantages:
- Lower absolute strength/hardness than steel or titanium
- Softer material — prone to scratches or deformation if mishandled
- Thermal expansion can affect tight tolerances in varying temperatures
- Higher material cost than basic steels (though offset by faster machining)
- Not ideal for extreme high-temperature applications
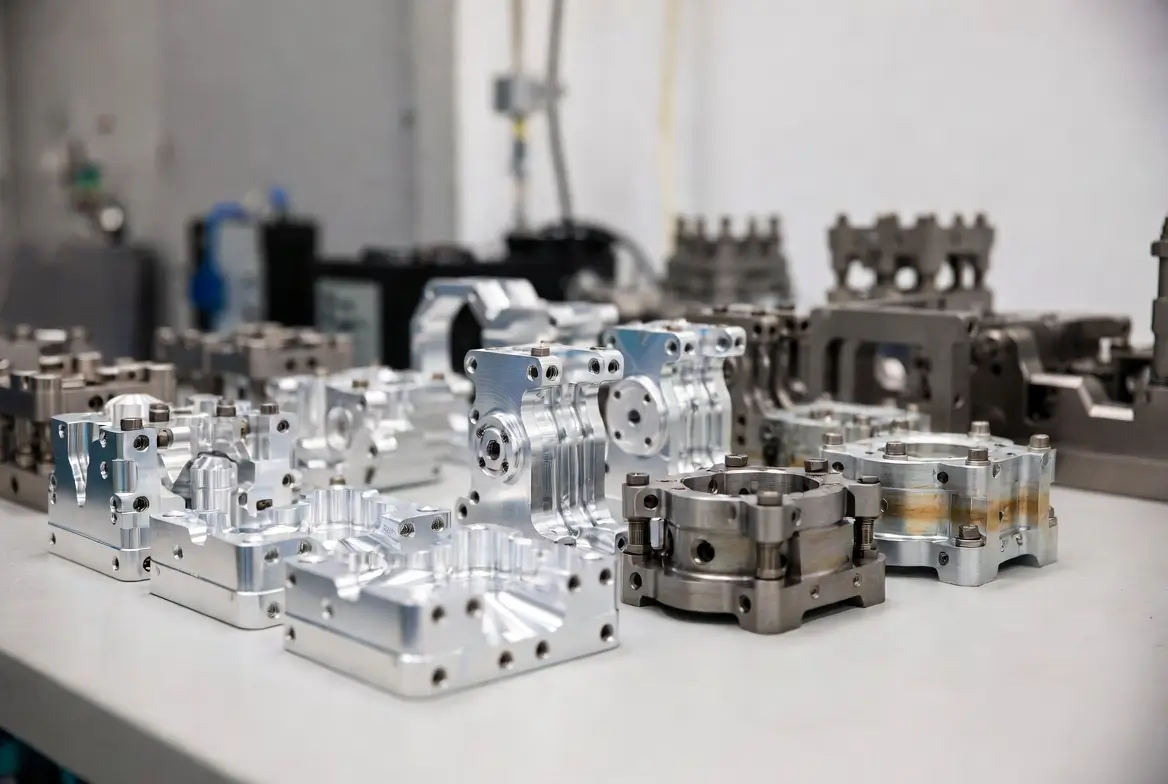
Real-world applications showcase aluminum’s versatility across industries:
- Automotive: Engine mounts, brackets, suspension parts, and custom brackets for performance vehicles.
- Consumer Electronics: Drone frames, phone/laptop enclosures, heat sinks for efficient cooling.
- Robotics: Lightweight structural arms, joints, and housings for faster movement and reduced inertia.
- Aerospace: Lightweight brackets, frames, and structural components (e.g., 7075 for high-stress parts) reduce fuel consumption while maintaining safety.
Cost is influenced by several factors: part complexity (more axes/tool changes = higher price), order quantity (prototypes are expensive per unit; 100+ pieces drop costs significantly), alloy choice (6061 is cheapest, 7075 is pricier), and surface treatments (anodizing adds moderate cost, powder coating more).
Aluminum CNC machining strikes an ideal balance of performance, speed, and affordability for most modern applications.
Conclusion: Start Your Aluminum Machining Journey
And just like that, your story reaches its exciting climax. That once-abstract idea—a lightweight drone frame soaring through the sky, a sleek consumer electronics enclosure that feels premium in hand, or a precision automotive bracket that performs flawlessly—has now taken physical form. Thanks to aluminum CNC machining, your concept has been transformed from pixels on a screen into a strong, accurate, lightweight part ready to fly, protect, or perform.
The journey—from choosing the right alloy and optimizing your design through high-speed machining and thoughtful finishing—proves that turning bold ideas into reality doesn’t have to be slow, expensive, or uncertain.
Now it’s your turn. Upload your CAD file today to Us. Get an instant quote, compare options, and kick off prototype production in days—not months.
Aluminum CNC machining remains one of the fastest, most reliable, and cost-effective ways to bring creative visions to life with professional-grade quality. Your next breakthrough part is just a few clicks away.
Let’s make it real.

Ryan Wang
Ryan Wang is the CNC Machining Expert at Cncpioneer, with over 15 years of hands-on experience as a CNC programmer, process engineer, senior machinist, and precision manufacturing specialist. He has helped companies in aerospace, automotive, medical, and electronics sectors achieve micron-level tolerances and scale from prototypes to high-volume production. Ryan is also an experienced instructor in advanced CNC techniques, particularly five-axis machining and challenging materials.